This add-on is pre-installed on Sisense in Linux environments and its version could be different. The download link is for Sisense on Windows.
The Sisense Comments add-on enables you to add a comment box within the Sisense dashboard using the iFrame widget. Comment boxes provide a platform for annotation and social collaboration allowing viewers to discuss your visualizations.
Note: The comments in this example are hosted on a 3rd party site. If you require comments to be hosted internally, another script/tool may be used.
To install the Comments add-on:
- Download the attachment.
- Extract the .zip folder into the plugins folder. If the folder does not exist, create it prior to extracting the .zip file.
For V7.1 and earlier: C:Program FilesSisensePrismWebpluginsiFrameWidget
For V7.2 and later: C:Program FilesSisenseapppluginsiFrameWidget
- Restart the IIS.
If you installed IIS express when installing Sisense: Restart the service PrismWebExpress
If you installed IIS when installing Sisense: Open the Command Prompt, type iisreset and click Enter.
- Set up a free HTML Comments Box Account. You can sign in with an existing Google account here to set up a free comments box. You may of course use another tool, but the setup may be slightly different.
- Copy the script given on the page or just click “copy” button, once you have signed up. There are additional options available by clicking the options link (at the top of the instructions section) (these include several styling and metadata options), but this article describes the default options.
- Right-click Comments.html, and select Save Link As to download the comments page and save it to the plugin’s folder.
- Using a text editor like Notepad ++, open the Comments.html file.
- Locate the following line:
<!– INSERT SCRIPT HERE –>
and replace this line with the script you copied from Step 5 and save the file.
- Open the Sisense dashboard you want to add the Comments box to. Create a new widget and click Advanced configuration.
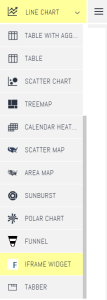
- From the Widgets list, select the iFrame widget.

- On the right side of the page, in the IFRAME URL field, enter /plugins/iFrameWidget/Comments.html.
- Click Apply. An iFrame widget with the Comments add-on is displayed in your dashboard.
15 July 2020:
- Updated the readme file to include information on how to configure new security policies to work with the Comments plugin
24 February 2020:
- Fixed ‘missing iFrame URL section on design tab’
- Fixed ‘filtering is not applied to iFrame widget’
- Added readme file


